3. Creating domain wide delegation account
Creating Google Apps domain wide delegation account
This information is derived from: https://developers.google.com/+/domains/authentication/delegation
It's lengthy, but I'll do my best to keep this short and sweet!
Under the "API Manager" frame, click on "Credentials", then the "Manage service accounts" tab.

Click "Manage service accounts"
Click "CREATE SERVICE ACCOUNT"

Click "CREATE SERVICE ACCOUNT"
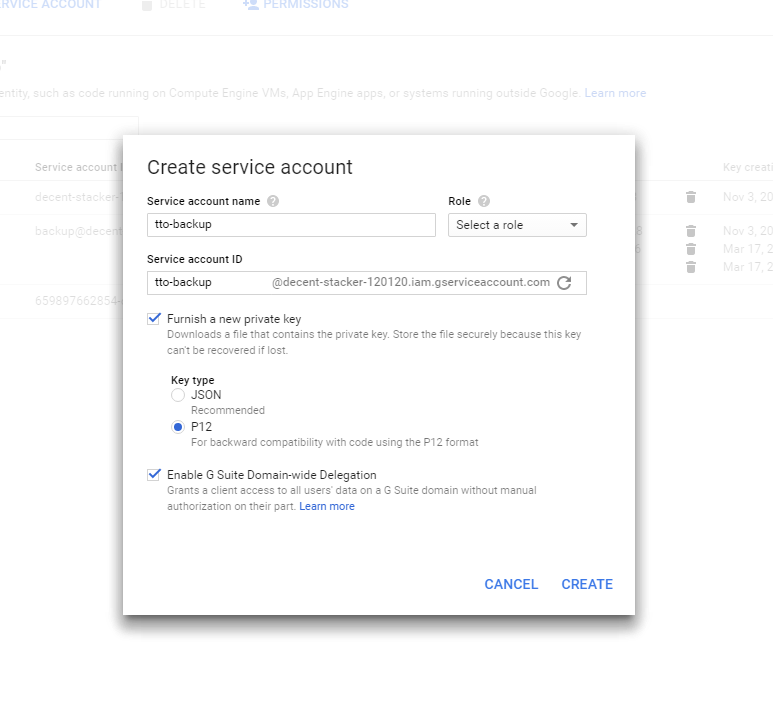
Fill out the boxes as appropriate. You can call it whatever name you want, such as "tto-backup". Make sure to select "Furnish a new private key", Keytype of "P12" AND "Enable G Suite Domain-wide Delegation"

Fill out information in the box. Select "P12" as the key type and "Enable G Suite Domain-wide Delegation"
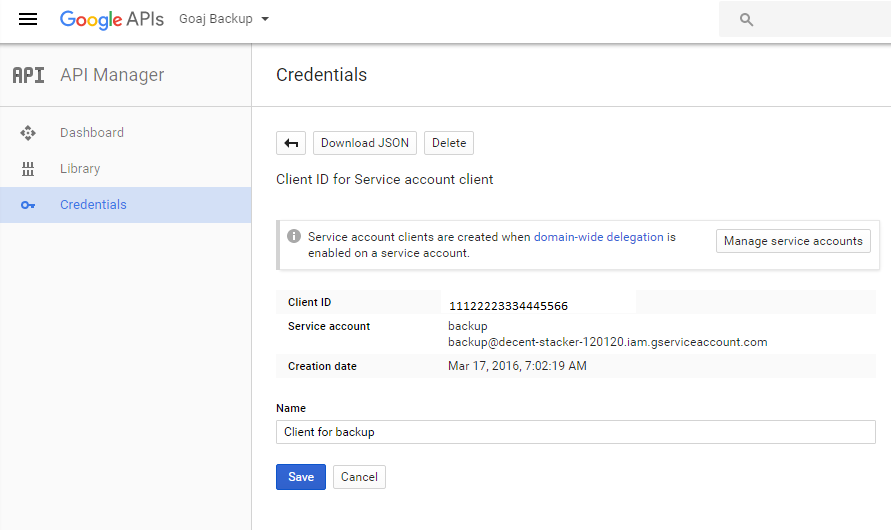
Once created, you should see the service account now under the "Service Accounts" window. Click on the View Client ID link and write down the "Client ID" (or just copy it to a notepad instance.)

Select "View Client ID"

Copy the "Client ID", we'll be needing this on the next step.
Updated less than a minute ago
